SePay Integration Guide
Step-by-step instructions to connect SePay with your Uni8 community, enabling bank transfer payments via VietQR.
Step 1: Create and Set Up SePay Account
-
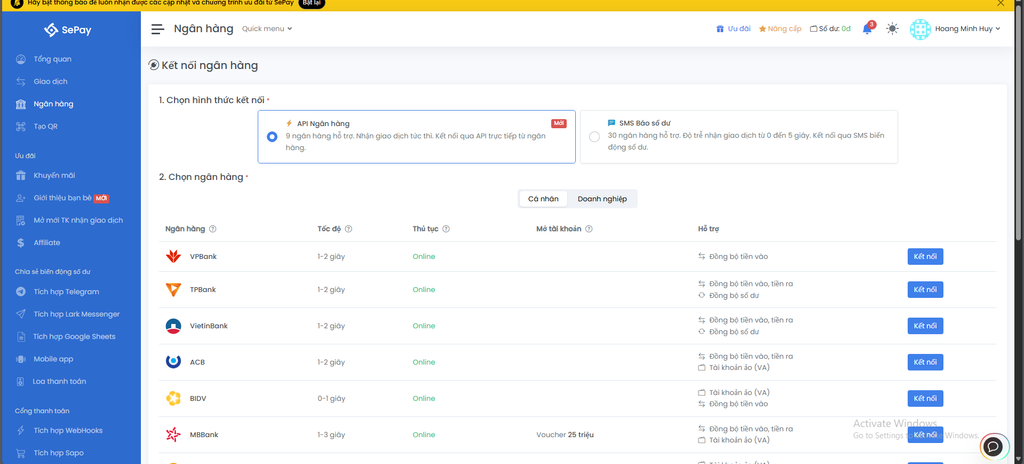
Go to SePay Login and sign in to your account.
-
Visit Bank Connection - SePay to connect your bank account.
-
Enter your bank information and follow SePay's instructions.
Step 2: Company Configuration
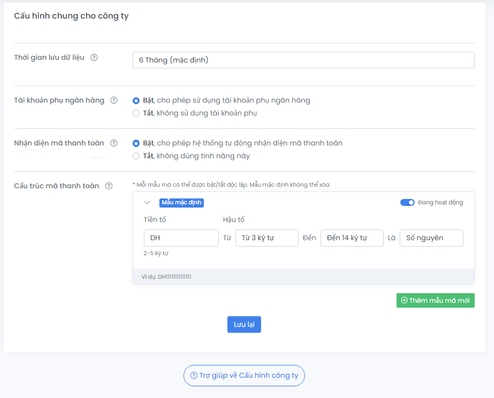
- Go to Configuration - SePay to set up company settings.
In the configuration section, make sure to enable and activate these 2 important settings:
- Payment Code Recognition
- Payment Code Structure (DH code)
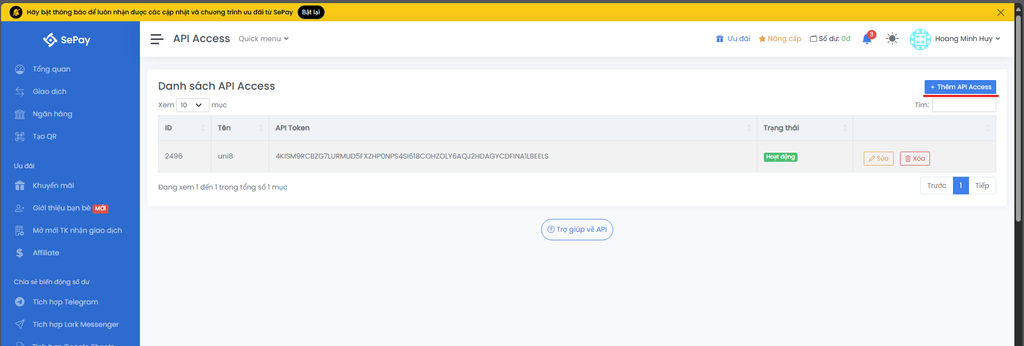
Step 3: Create API Token
Visit API Access - SePay to create an API Token for authentication. Enter a name (e.g., uni8) and select status "Active" to create the API Token.
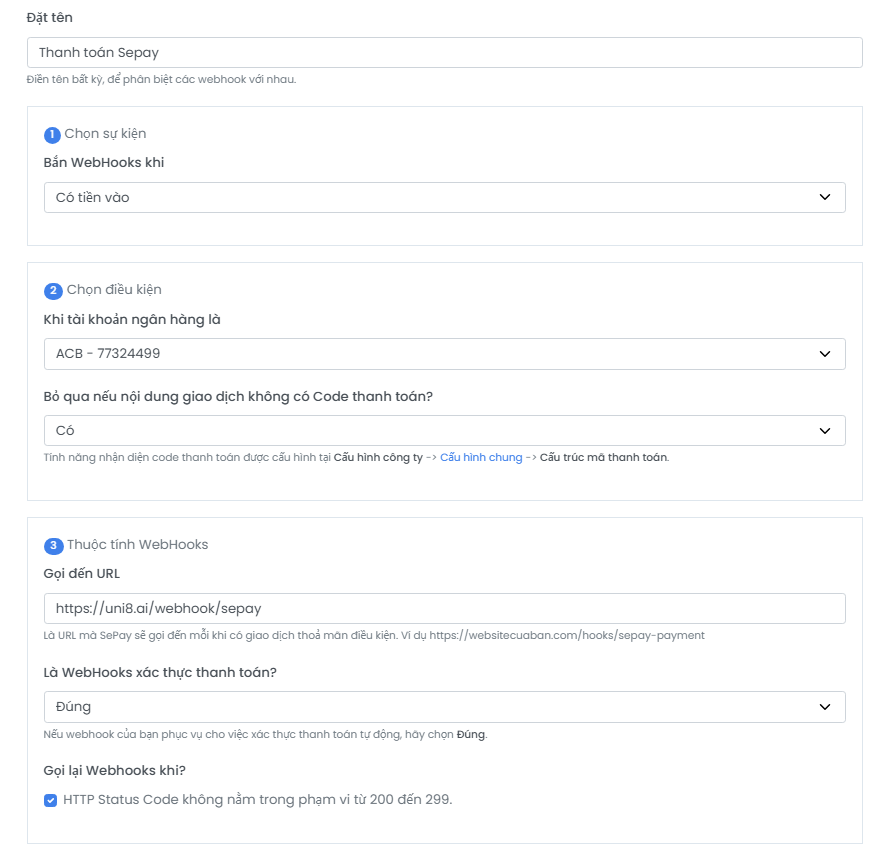
Step 4: Add Webhooks
Go to Webhooks - SePay and select "Add webhook".
Fill in the webhook information with the following configuration:
- Name: your choice (e.g., thanh toán uni8)
- Send webhook when: select "Money in"
- When bank account is: select the bank you just added
- Skip if transaction content has no payment code?: select Yes
- Call to URL:
https://uni8.ai/webhook/sepay - Is this a payment verification webhook?: select "Yes"
- Retry webhook when?: check this option
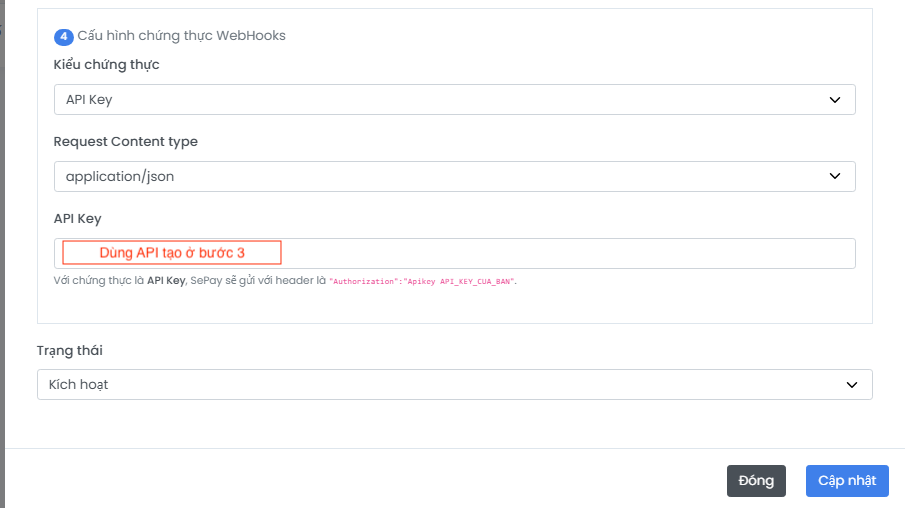
- Authentication type: select API Key
- Request Content type: select application/json
- API Key: enter the API Token created in step 3
Step 6: Integrate SePay into Uni8
Go to "Settings / Payment Gateway" and select "VND" as the payment currency.
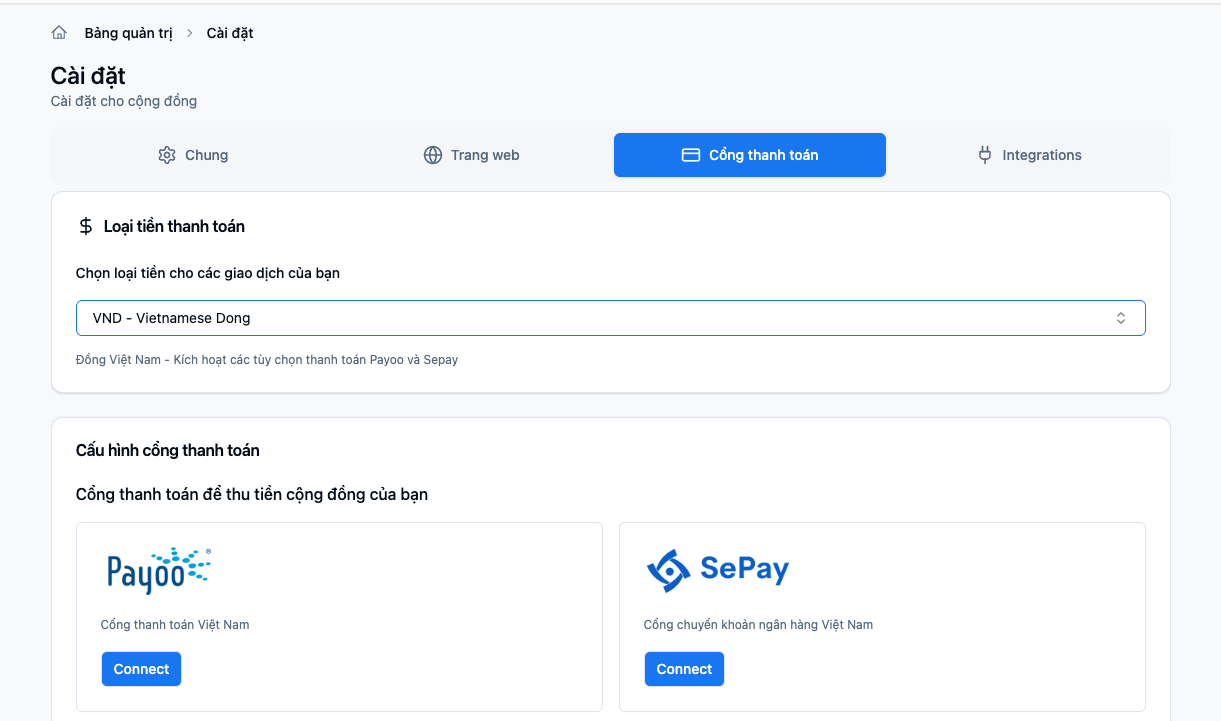
Configure SePay and enter your bank account information from SePay:
| Field | Value |
|---|---|
| Select bank | The bank you added in SePay |
| Beneficiary name | Account holder name |
| Account number | Bank account number |
| SePay API Key | The API key from API Token (step 3) |

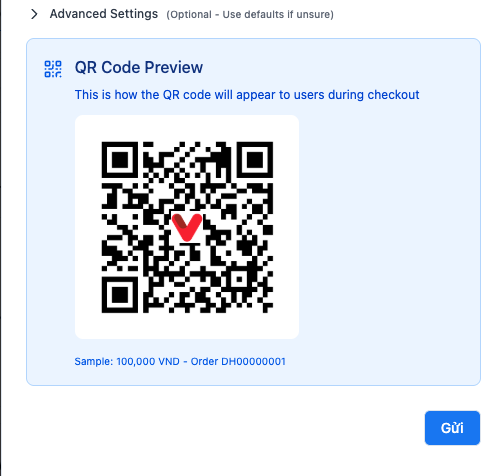
After entering all information, a sample QR code will be displayed.
Next Steps
- Tax & E-Invoice Configuration — Set up VAT and connect MISA or SePay e-invoice
- Configure general settings
- Set up membership tiers